
Here I have mentioned the steps on how to deploy a project to SSMS. The package I have used here is created in my previous blog.
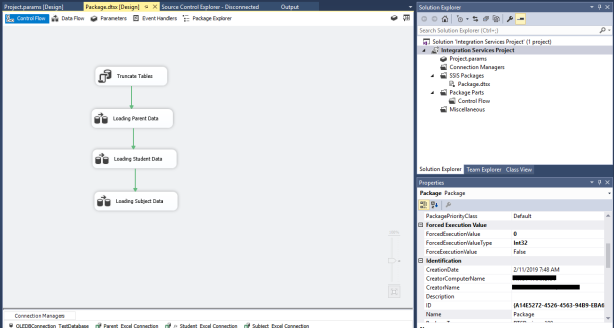
The package I want to deploy is as follows.
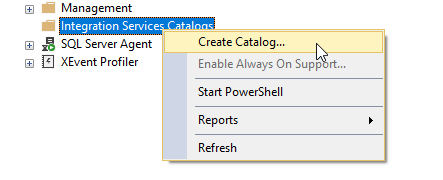
Step 01: Create a catalog in SSMS
Right click on the Integration Service Catalog and select Create Catalog.
Then the wizard for catalog creation appears as follow.

After that enable CLR Integration checkbox in the wizard. And enable “automatic execution of Integration Services stored procedure at SQL Server startup”.
Leave the name of the catalog database as it is and enter a password for the catalog database.
Then you can see the created database under the “Integration Services Catalogs”.

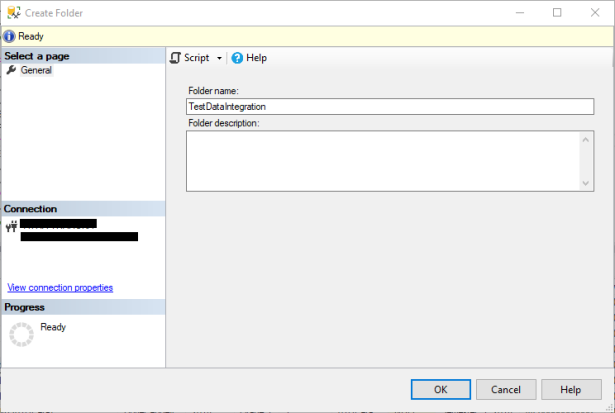
Right-click the SSISDB database you created then select “Create Folder”.

Provide the Folder name and if you need, add a description.
Then the folder appears with two more sub-folders (Projects and Environments) which in default come with it.

The project subfolder is the place where we deploy our SSIS projects.
Step 02: Deploy Project from SSIS
Right click on the project in SSIS and select Deploy.

Then the Integration Services Deployment Wizard window appears. Follow the instructions of the Integration Services Deployment Wizard.

Provide the server name by browsing through the “Browse” button.

Select your server name either from the Local Server or Network Server tab.

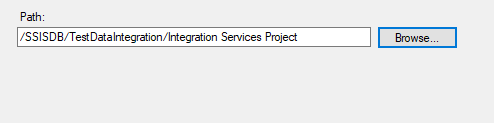
Browse the file path and select the folder, created in the Integration Services Catalog in SSMS. This is the location where we deploy our project to SSMS.
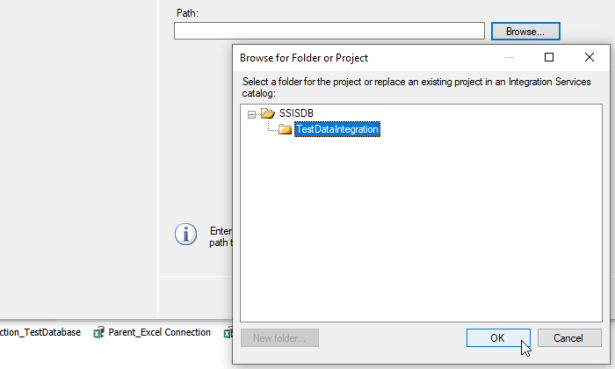
Then you will see the path as follow.
Follow the instructions of the wizard and finally select deploy.
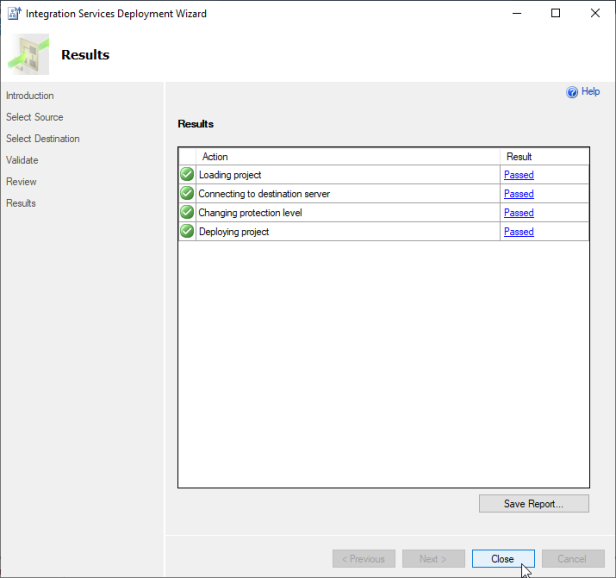
Then close the window. Go to the SSMS and refresh the SSISDB located under Integration Services Catalogs. Then you will be able to see the deployed project in the Projects subfolder. If you expand the deployed project you will find the packages created in it as follow.

Finally, you have deployed the project.
